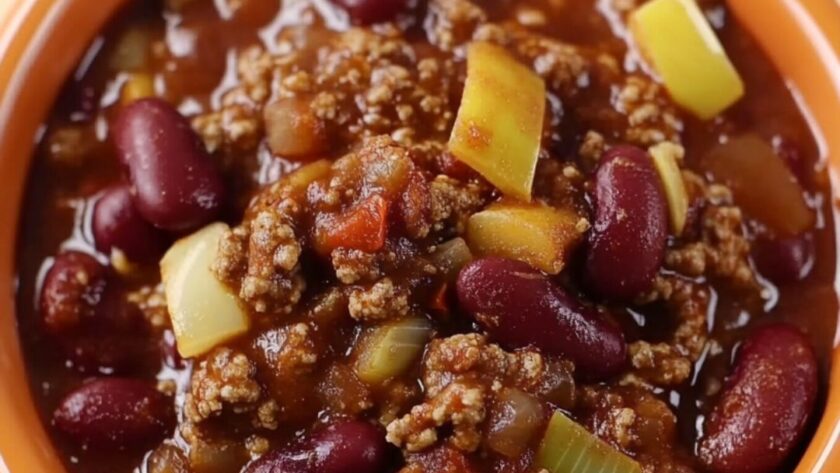
This hearty and flavorful chili combines the classic spices of a Bloody Mary with the warmth of a traditional chili. It’s a versatile dish that can be prepared with common pantry ingredients, making it both convenient and delicious. Perfect for a quick weeknight meal or a cozy weekend dinner, this chili offers a delightful twist with its rich, spicy tomato base.
Recipe Ingredients:
- Olive oil, for sauteing
- 2 stalks celery, finely diced
- 1 onion, finely diced
- 2 cloves garlic, chopped
- 3 pounds ground beef
- 1 tablespoon chili powder
- 1 teaspoon ground cumin
- 1 teaspoon ground oregano
- 15 ounces Bloody Mary mix, plus more if needed
- 1/4 cup vodka, optional
- 1 tablespoon Montreal steak seasoning
- Several dashes Tabasco, or to taste
- Several dashes Worcestershire sauce, or to taste
- One 15-ounce can kidney beans, drained and rinsed
- One 15-ounce can pinto beans, drained and rinsed
How To Make Bloody Mary Chili?
- Sauté the veg: In a large pot over medium heat, heat the olive oil, then add the diced celery and onion. Cook until softened, about 5 minutes. Stir in the garlic and cook for 1 minute more.
- Brown the beef: Add the ground (minced) beef and cook until fully browned, around 5–10 minutes. Drain off any excess fat.
- Add spices: Stir in the chili powder, ground cumin, and oregano. Let the spices toast for a minute to release their aroma.
- Mix the liquids: In a jug or bowl, combine the Bloody Mary mix, vodka (if using), Montreal steak seasoning, Tabasco, and Worcestershire sauce. Pour into the pot with the beef.
- Add the beans: Stir in the kidney beans and pinto beans until well combined.
- Simmer low and slow: Cover the pot, reduce the heat to low, and simmer for 1 hour. Stir occasionally. If the chili thickens too much, add a splash more Bloody Mary mix or water.
- Serve and enjoy: Ladle the chili into bowls and serve with celery sticks, carrot sticks, ranch dressing, and tortilla chips for a fun, snack-style twist.

Recipe Tips:
- Choose Quality Ground Beef: Opt for lean ground beef to reduce excess fat, ensuring a healthier and less greasy chili.
- Enhance Flavor with Fresh Spices: Using freshly ground spices like cumin and chili powder can significantly boost the dish’s aroma and taste.
- Simmer Slowly: Allowing the chili to simmer on low heat for an extended period helps meld the flavors together, resulting in a richer taste.
- Adjust Consistency: If the chili becomes too thick during cooking, add a bit more Bloody Mary mix or water to reach your desired consistency.
- Taste and Season: Before serving, taste the chili and adjust the seasoning with salt, pepper, or additional spices to suit your preference.
How To Store & Reheat Leftovers?
- Refrigerate: First, let the leftover chili cool to room temperature. Then, transfer it to an airtight container and refrigerate. Consume within 3–4 days for optimal freshness.
- Freeze: After cooling, place the chili in freezer-safe containers, leaving some space at the top for expansion. Freeze for up to 3 months. To thaw, move the container to the refrigerator overnight before reheating.
- Reheat: Transfer a serving of chili to a microwave-safe bowl. Cover and heat on medium power for 2–3 minutes, stirring halfway through, until hot.
Nutrition Facts
- Calories: 290
- Total Fat: 12g
- Saturated Fat: 4.5g
- Cholesterol: 70mg
- Sodium: 800mg
- Potassium: 750mg
- Total Carbohydrate: 20g
- Dietary Fiber: 6g
- Sugars: 5g
- Protein: 22g
Check out More Recipes:
Bloody Mary Chili
Description
This hearty and flavorful chili combines the classic spices of a Bloody Mary with the warmth of a traditional chili. It’s a versatile dish that can be prepared with common pantry ingredients, making it both convenient and delicious. Perfect for a quick weeknight meal or a cozy weekend dinner, this chili offers a delightful twist with its rich, spicy tomato base.
Ingredients
Instructions
- Sauté the veg: In a large pot over medium heat, heat the olive oil, then add the diced celery and onion. Cook until softened, about 5 minutes. Stir in the garlic and cook for 1 minute more.
- Brown the beef: Add the ground (minced) beef and cook until fully browned, around 5–10 minutes. Drain off any excess fat.
- Add spices: Stir in the chili powder, ground cumin, and oregano. Let the spices toast for a minute to release their aroma.
- Mix the liquids: In a jug or bowl, combine the Bloody Mary mix, vodka (if using), Montreal steak seasoning, Tabasco, and Worcestershire sauce. Pour into the pot with the beef.
- Add the beans: Stir in the kidney beans and pinto beans until well combined.
- Simmer low and slow: Cover the pot, reduce the heat to low, and simmer for 1 hour. Stir occasionally. If the chili thickens too much, add a splash more Bloody Mary mix or water.
- Serve and enjoy: Ladle the chili into bowls and serve with celery sticks, carrot sticks, ranch dressing, and tortilla chips for a fun, snack-style twist.
Notes
- Choose Quality Ground Beef: Opt for lean ground beef to reduce excess fat, ensuring a healthier and less greasy chili.
Enhance Flavor with Fresh Spices: Using freshly ground spices like cumin and chili powder can significantly boost the dish’s aroma and taste.
Simmer Slowly: Allowing the chili to simmer on low heat for an extended period helps meld the flavors together, resulting in a richer taste.
Adjust Consistency: If the chili becomes too thick during cooking, add a bit more Bloody Mary mix or water to reach your desired consistency.
Taste and Season: Before serving, taste the chili and adjust the seasoning with salt, pepper, or additional spices to suit your preference.
Bloody Mary Chili